Microsoft Entra SAML
If your organization uses Microsoft Entra for user authentication, you can configure IQNECT to allow login using Identity Provider (IdP) credentials. IQNECT supports integration with the OpenID Connect (OIDC) protocol and the SAML 2.0 protocol. Both implementations are functionally equivalent when used with IQNECT. The following instructions describe how to configure IQNECT to work using the SAML2.0 protocol using Microsoft Entra as the identity provider (IdP).
SAML 2.0 integration only supports Service Provider initiated logins.
Overview
To set up SAML in Entra, you need to follow these steps. Additional detail is provided below.
- Create an Enterprise Application
- Complete Basic SAML Configuration
- Complete Attributes and Claims
- Assign Users or Groups
- Send SAML Configuration to IQNOX
Required Entra Permissions
You must have at least Cloud Application Administrator privileges in your Microsoft tenant in order to create the Enterprise Application as documented here. You may need to work with your organization's enterprise IT administrator to complete this configuration.
Details
Step 1: Create an Enterprise Application
You'll need to determine the following information prior to performing this step:
- The name of the application. IQNOX suggests following your organization's standards for naming applications. If you don't have a standard for naming applications, use IQNOX IQNECT Production.
Since IQNECT is not a gallery application, you must choose "Integrate any other application you don't find in the gallery (Non-gallery)."
- From the Entra admin center, select Applications > Enterprise Applications.
- Then, click "New application" at the top of the list.
- Then, complete the form.

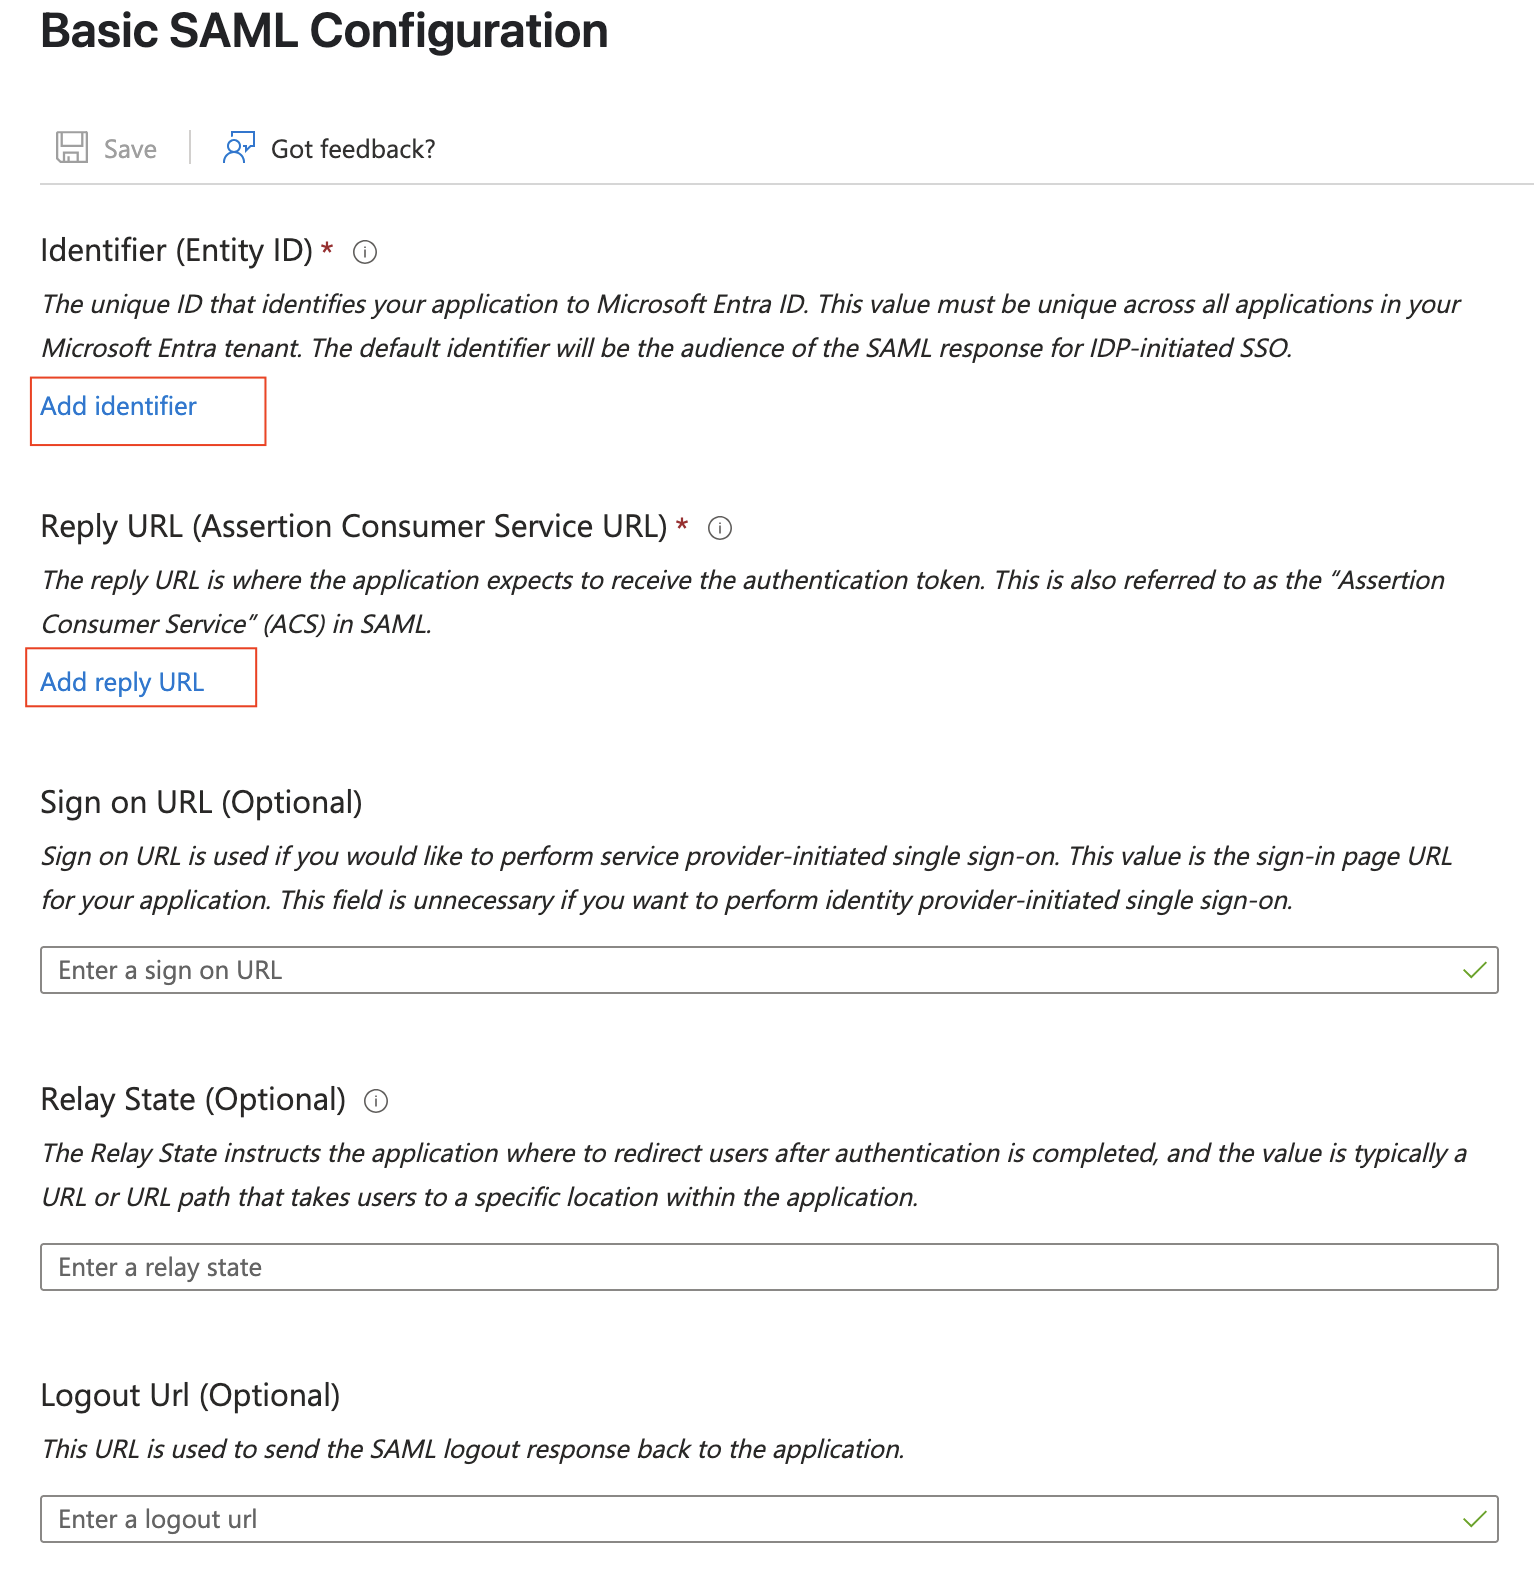
Step 2: Complete Basic SAML Configuration
You'll need to determine the following information prior to performing this step:
- Identifier (Entity ID). This should be unique within your tenant and must align to your environment configuration. If you only have one environment, use
https://api.iqnect.ai. - Reply URL (Assertion Consumer Service URL). This should always be
https://api.iqnect.ai/sso/callback/saml
-
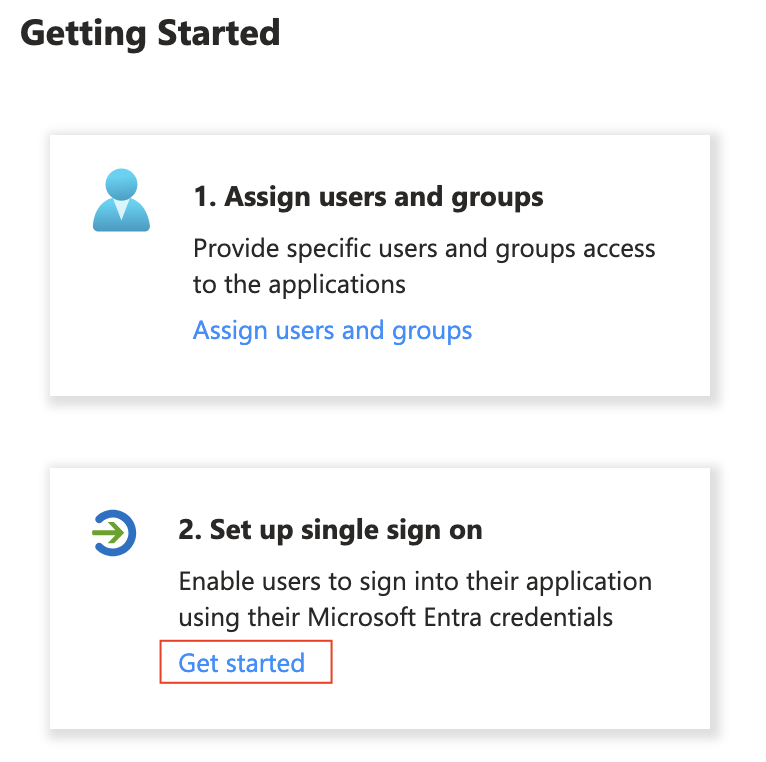
In the "Overview" page of the new application, click 'Get Started' in the '2. Set up single sign-on' card:
-
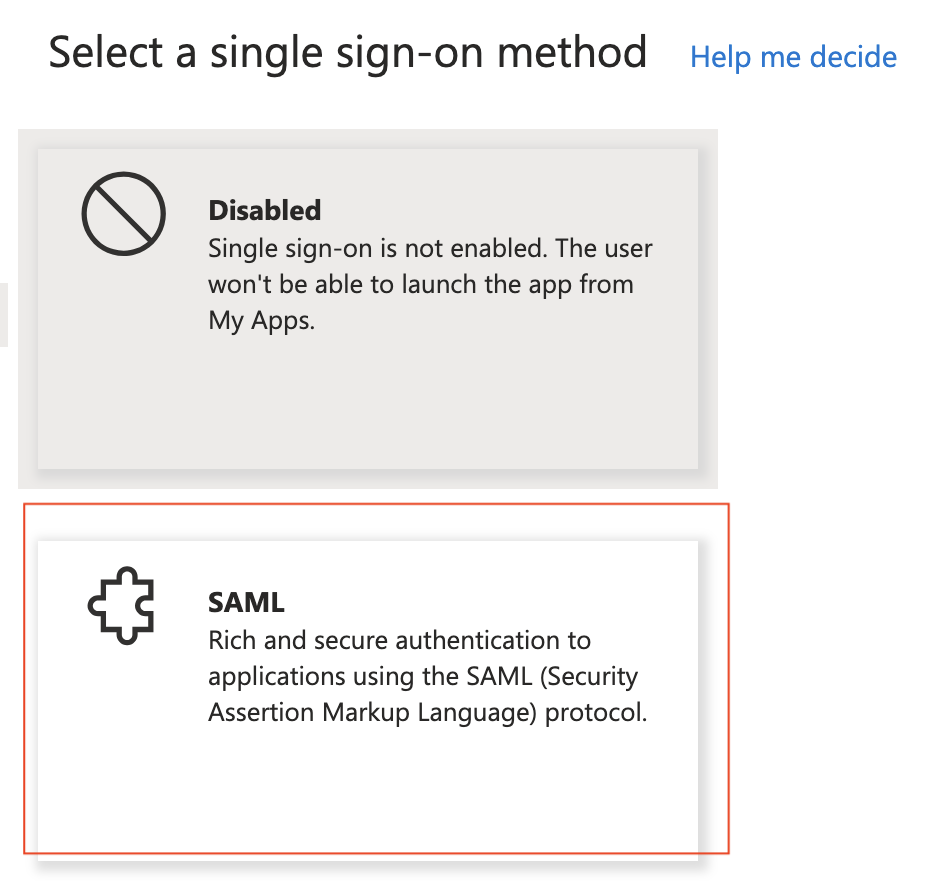
Click the "SAML" card.
-
Edit the "Basic SAML Configuration" by clicking the pencil icon and completing the form. Provide the information you determined at the beginning of this step.


Step 3: Complete the Attributes and Claims
IQNECT requires three pieces of information from your identity provider:
- the user's display name (to personalize the user experience)
- the user's email address (to correspond with the user),
- and the user's unique identifier in your directory (to properly authorize the user).
This information is provided through "additional claims" in Entra. This section explains how to find the proper information or customize it as needed to meet your organization's standards.
COMPLIANCE WITH INTERNAL IT STANDARDS
Some organizations are strict about namespaces and names of attributes. IQNECT supports arbitrary names for these required attributes and, therefore, can support your organization's naming convention.
If your organization doesn't have standards for naming attributes, you can use the suggested naming convention.
DETERMINING THE CLAIM NAME
The "Claim Name" consists of the namespace concatenated with the name of the attribute. For example, the "claim name" for this attribute is http://schemas.xmlsoap.org/ws/2005/05/identity/claims/givenname .

Here is an example of attribute configuration where the three attributes required by IQNECT have been customized.

In step 5, when you send the SAML information to IQNOX, you'll provide the following information:
- Display name:
iqnect/displayname - Email:
iqnect/emailaddress - User unique identifier:
iqnect/uid
Remember, these are just example names. Please provide the full claim name as configured in your application.
Step 4: Assign Users or Groups to IQNECT
Please assign the appropriate users and/or groups to achieve your expected business needs. IQNOX does not need to know the names of users or groups added to your application.
Step 5: Send SAML Information to IQNOX
The following information needs to get to IQNOX so the tenant SSO to be configured:
- Metadata XML URL
- IdP Entity ID
- SAML claim name for the user's display name, email address, and unique identifier.
Please provide this information to the support engineer working with you to install IQNECT.